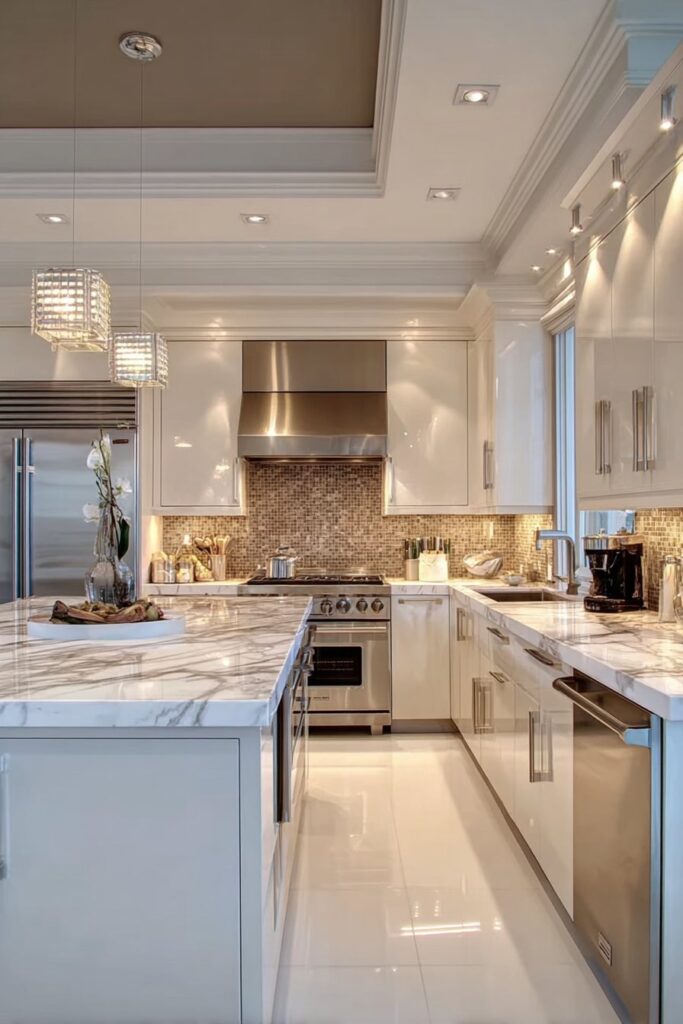
I’ve learned that stunning kitchen decor designs mean nothing if you’re zigzagging across the space with a hot pan, dodging children and pets along the way. Gorgeous symmetry falls flat when the fridge sits 30 feet from your breakfast prep area. In reality, beautiful kitchens can be surprisingly hard to live in. Through my own kitchen journey, I discovered that the best spaces balance style with smart functionality. In this guide, I’m sharing nine practical design ideas for small kitchen spaces and larger ones alike—solutions that transformed how I cook and will help you create a kitchen that actually works with your daily routine.
Smart Kitchen Triangle Layout Ideas
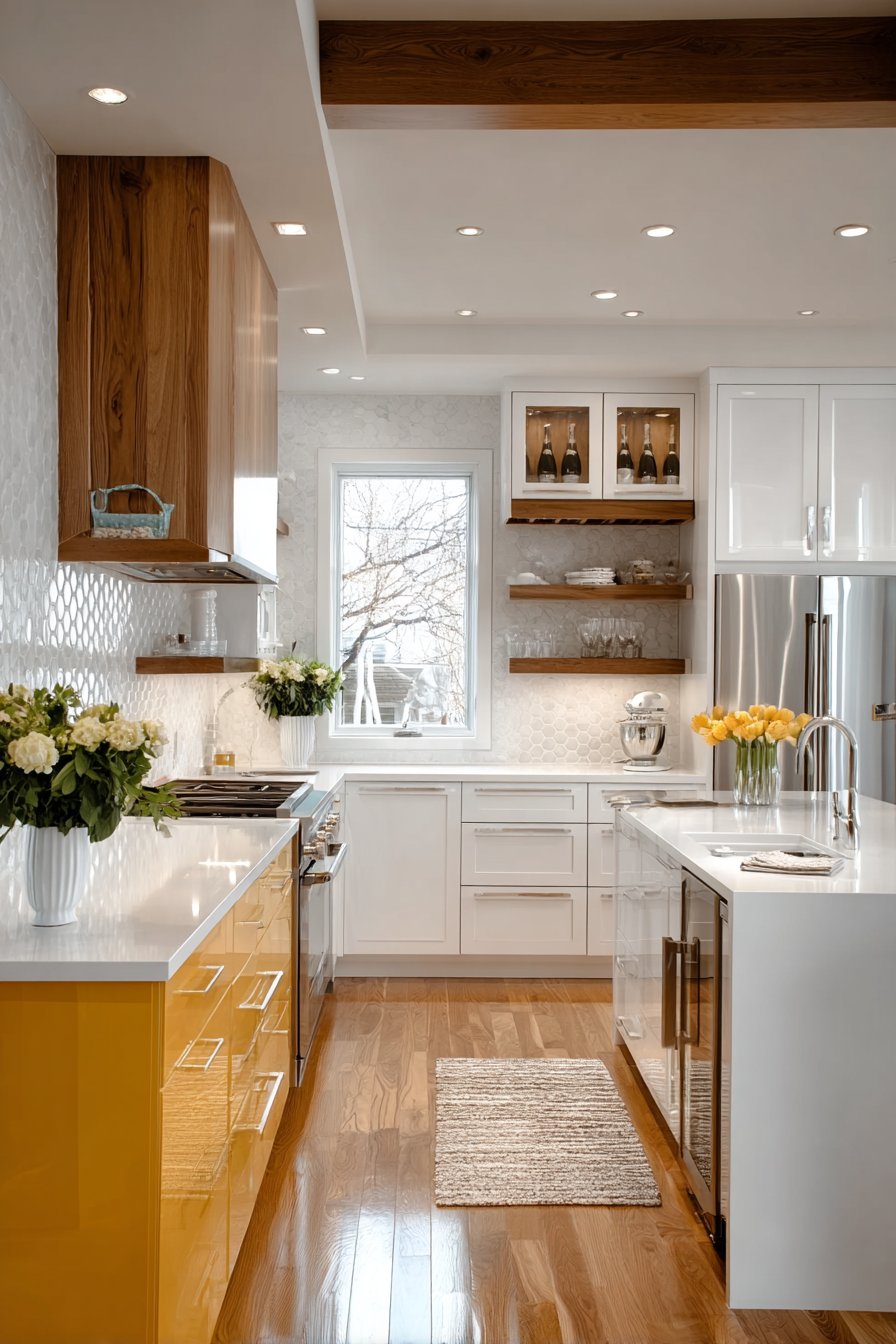
The turning point for me came when I stood in my old kitchen holding a cutting board, walking from the refrigerator at one end to the sink on the opposite wall, then back to the stove tucked in a corner. Three unnecessary trips for one simple meal. That frustration led me to discover what designers call the kitchen work triangle, and it changed everything about how I approach kitchen decor designs.
What Makes This Design Work
The kitchen work triangle connects your three busiest stations: the sink, stove, and refrigerator. Picture invisible lines drawn between these points, forming a triangle that maps your natural cooking flow. This concept originated in the 1940s at the University of Illinois, where architects applied geometric principles to eliminate wasted movement. Designer Lillian Moller Gilbreth developed this approach while partnering with the Brooklyn Borough Gas Company, analyzing how to optimize food storage, preparation, and cooking zones.
The brilliance lies in its simplicity. Your sink typically becomes your starting point for rinsing vegetables, your refrigerator stores ingredients you grab repeatedly, and your stove is where everything comes together. When these three points work in harmony, you spend less time walking and more time actually cooking. The layout also reduces collision risks when multiple people share the space, and it minimizes the distance you carry hot pots or sharp knives.
How to Implement It in Your Space
The National Kitchen and Bath Association provides specific measurements that transformed how I planned my own kitchen renovation. Each side of your triangle should measure between 4 and 9 feet. The total perimeter of all three sides combined should fall between 13 and 26 feet[11][12]. These dimensions prevent your workspace from feeling either cramped or overly spread out.
When I redesigned my space, I positioned my sink between my refrigerator and stove, creating the most efficient prep zone. Cabinets and obstacles shouldn’t intersect any leg of the triangle by more than 12 inches. Traffic flow matters too. Place your refrigerator nearest to the kitchen entrance so family members grabbing snacks don’t cross through your active cooking area. The area between your sink and stove becomes your primary food preparation zone, so allocate generous counter space there.
Why Shera Recommends This Layout
After implementing this principle, my cooking transformed from a chore into genuine enjoyment. I no longer retrace my steps or navigate around obstacles while holding ingredients. The design works beautifully for both simple kitchen designs small kitchens require and more spacious layouts. In detail, the triangle adapts to L-shaped, U-shaped, and galley configurations.
For smaller spaces especially, this layout maximizes every square foot. When working on design ideas for small kitchen spaces, the triangle prevents the common mistake of spreading appliances too far apart just to fill wall space. Indeed, compact doesn’t mean inefficient. My previous tiny kitchen felt more functional than my friend’s expansive space because the triangle kept everything within natural reach.
Common Mistakes to Avoid
The biggest error I see involves placing appliances too far apart, which makes cooking tedious and exhausting. Another frequent mistake is allowing obstructed pathways where kitchen islands, chairs, or furniture block movement within the triangle. I learned this the hard way when my initial island placement created a barrier between my sink and refrigerator.
Inadequate lighting in all three zones creates safety issues and reduces efficiency. Accordingly, I installed task lighting at each triangle point. Some homeowners position their refrigerator door to swing into the triangle’s path, forcing awkward maneuvering. Check if your refrigerator model allows door mounting on either side to optimize the swing direction. Finally, avoid placing your dishwasher far from your sink. These two stations work as a cleaning zone, and you want direct transfer from rinsing to loading without crossing your cooking path.
Pull-Out Cabinet & Drawer Storage
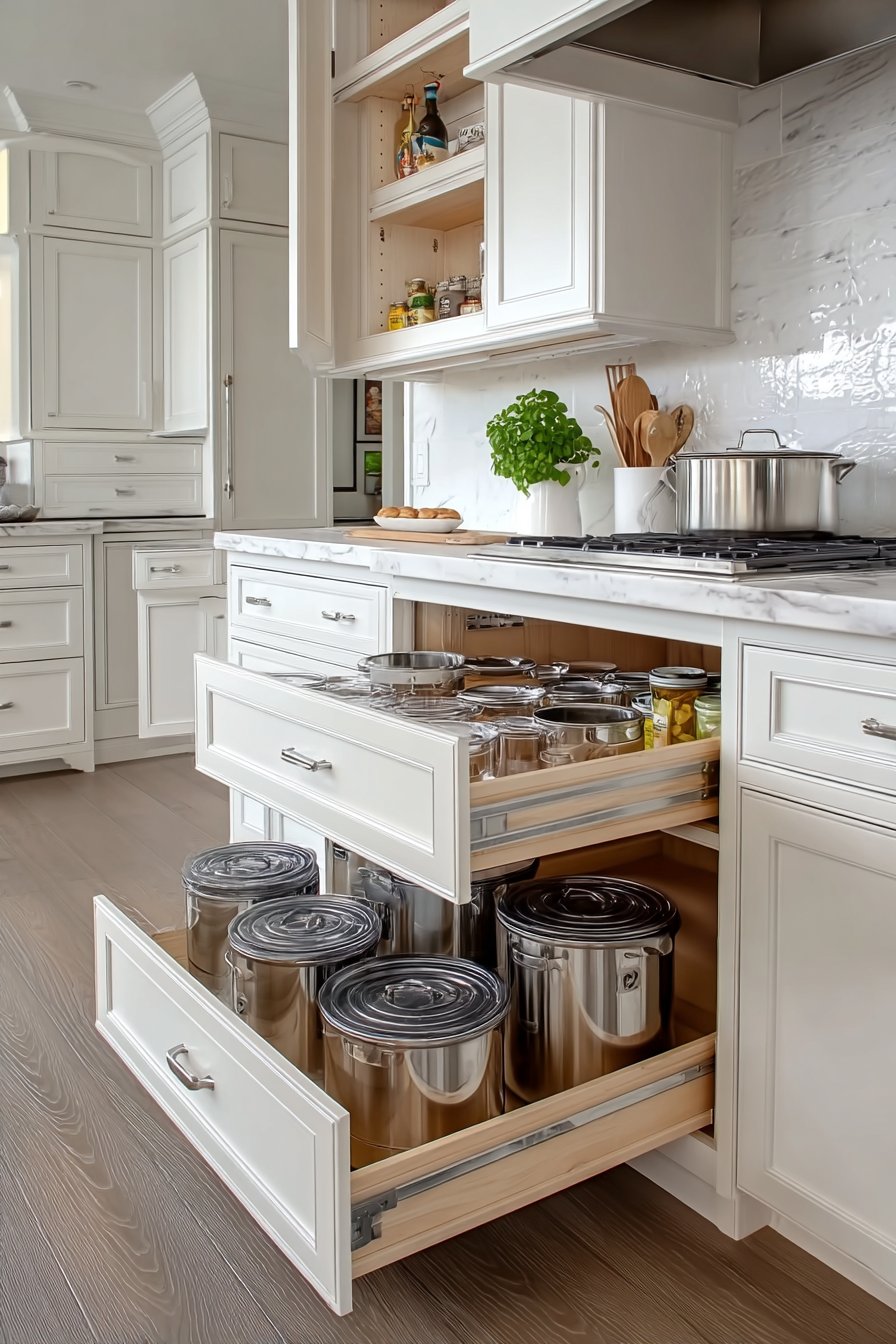
Staring into my lower cabinet felt like archeology. I’d crouch down, remove three pans to reach the one I needed, then restack everything before my knees started complaining. That daily frustration ended when I discovered pull-out cabinet organizers, and suddenly my kitchen decor designs became functional instead of just photogenic.
Types of Organizers That Improve Workflow
Pull-out organizers transform how you access stored items by bringing everything to you. Single-height pull-out shelves maximize vertical storage for pots, pans, and kitchen essentials. For instance, double-height options offer taller sides for safer stacking, letting you pair pots with their matching lids every time. Triple-height versions prevent heavy items like soup pots and cast iron cookware from tipping over.
Drawer systems work differently than shelves. Pull-out drawers with adjustable dividers separate utensils and tools while expanding to fit cabinet widths from 13 to 21 inches. These systems hold up to 50 pounds each, making them perfect for heavy small appliances like stand mixers. Two-tier cookware organizers feature independently operating shelves with the top tier for lids and the bottom tier with adjustable dividers for large pots and pans. The heavy-duty chrome-plated wire frames include 100-pound-rated full-extension soft-close ball-bearing slides.
Specialized organizers address specific storage challenges. Pull-out spice racks positioned next to your stove eliminate digging through dark cabinets. Tray bin-height drawers with dividers and grooves accommodate cutting boards, cookie sheets, and serving platters. Pull-out trash systems handle waste bins between 15 to 21 inches wide, with standard 35-quart bins fitting seamlessly. The ClosetMaid Double Pull-Out Basket measures approximately 12 by 18⅛ by 18⅛ inches and fits most narrow cupboards without wobbling.
Installation and Setup Tips
Prior to installation, measure your cabinet interior carefully. Standard upper cabinet shelves range from 10 to 15 inches tall, while lower cabinets often reach 16 inches to accommodate small appliances. Equally important is measuring between concealed hinges to determine drawer placement.
Most pull-out systems require screwing tracks to the cabinet bottom, which prevents drawers from tipping when fully extended and filled to capacity. Position drawers about 2 inches back from the shelf edge to ensure cabinet doors close properly. Create quarter-inch pilot holes before installing screws, making precise placement much easier. Coupled with plastic clips attached 1 inch in on all four corners, this secures drawers to frames.
How This Solved Shera’s Kitchen Storage Challenge
Installing mesh pull-out drawers changed my cooking routine completely. I positioned them in the cabinet between my sink, coffee maker, and cooktop, giving me easy reach for pots, lids, and pans during meal prep. The transformation went beyond convenience. I created a dedicated smoothie drawer for my blender accessories and a separate section for coffee additives and protein powders. No more kneeling on the floor, pulling my head inside cabinets, or emptying contents to grab one item from the back.
Best Kitchen Designs for Small Kitchens
Pull-out organizers increase storage efficiency by up to 50%, making them ideal home decor ideas for small kitchen layouts. These systems offer up to 50% more storage space without major renovations. For simple kitchen designs small kitchens require, narrow pull-out drawers fit into slivers of space, keeping oils, vinegars, and cooking utensils accessible yet hidden. Toe-kick pull-out storage maximizes traditionally wasted space, perfectly suited for sheet pans and cooling racks. When working on design ideas for small kitchen spaces, pull-out pantry cabinets tucked beside refrigerators store canned and boxed goods in compact areas.
Strategic Task Lighting for Kitchens
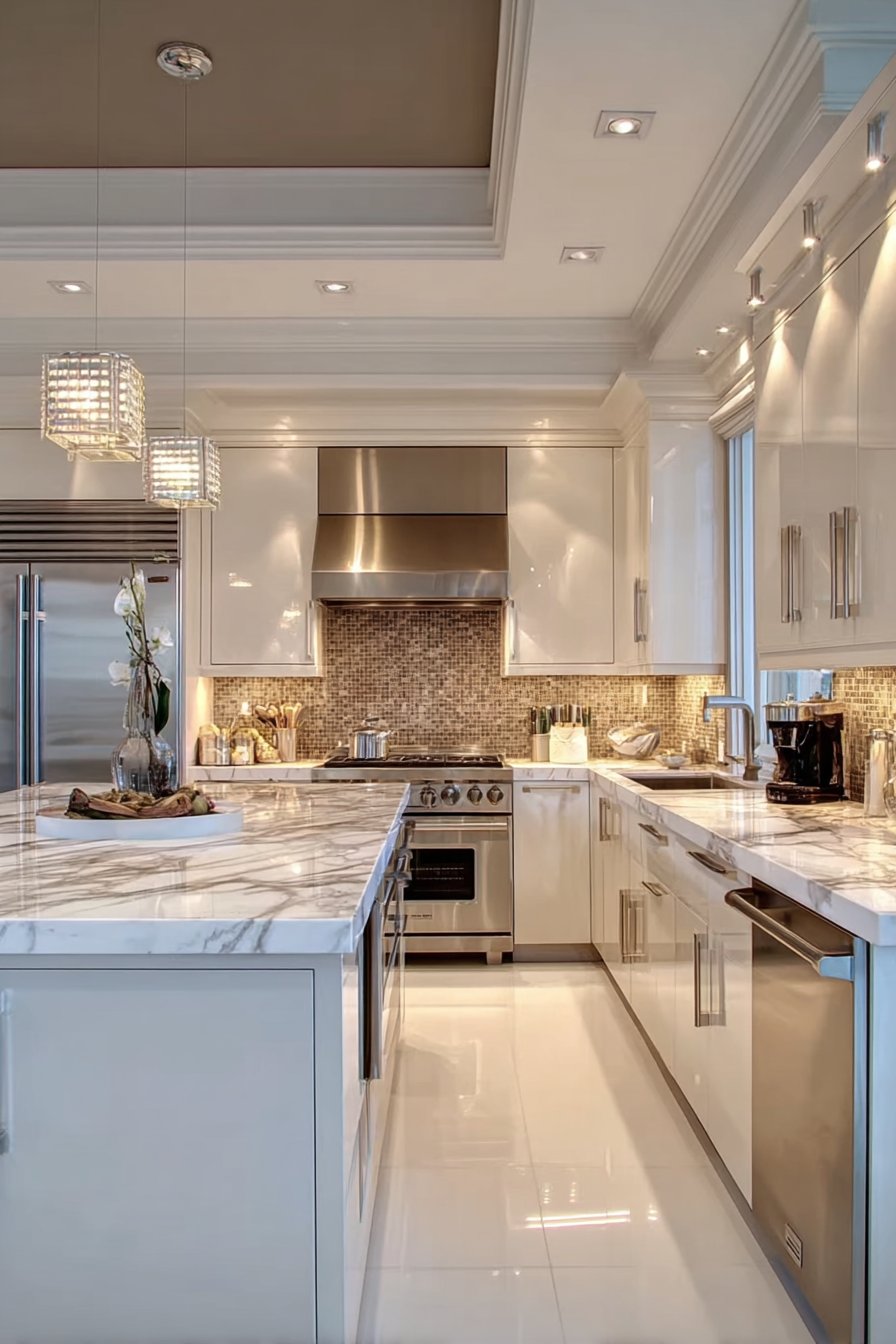
Chopping onions in my own shadow taught me that beautiful kitchen decor designs lose their purpose when you can’t see what you’re doing. My overhead fixture created more darkness than light on my counters, turning every meal prep into guesswork. That changed when I understood how strategic lighting placement transforms both safety and efficiency.
Essential Lighting Zones for Cooking
Kitchens require three distinct lighting types working together. Ambient lighting provides background glow through ceiling fixtures and recessed downlights, preventing you from walking into cabinets but offering insufficient task support alone. Task lighting delivers bright, focused illumination for chopping, cooking, and washing, with under-cabinet LEDs and directional spots proving most effective. Accent lighting adds visual drama by highlighting shelves, backsplashes, or architectural features.
Breaking your kitchen into specific zones determines where each lighting type belongs. Prep areas demand the brightest illumination at 75-100 foot-candles for detailed knife work. Baking zones need 50-75 foot-candles for precise measuring and decorating. Given that different activities require different brightness levels, I mapped my kitchen by function rather than symmetry.
Under-cabinet lighting became non-negotiable once I experienced its impact. This placement eliminates shadows cast by overhead cabinets, positioning light directly in front of you rather than behind. For instance, mounting strips toward the cabinet front with LEDs facing downward maximizes output. If your countertop has a reflective finish, affix lighting to the inside back of the face frame facing the backsplash to prevent glare. Studies confirm that task lighting focused on specific work areas improves accuracy and reduces eye strain.
Combining Pendant and Under-Cabinet Lights
Lighting designer Debbie Bernstein warns against relying solely on recessed downlights, which create harsh, flat spaces without depth. Layering becomes essential. Pendant lights should hang 28-36 inches above kitchen islands for proper coverage. On an eight-foot island, two larger pendants or three smaller ones work best, covering about two-thirds to three-quarters of the island length including spacing.
Recessed lighting requires strategic spacing. Position fixtures 3-4 feet apart with approximately 4-6 lights per 100 square feet. For ambient lighting specifically, install one spotlight for every 4 to 6 square feet of ceiling space. Correspondingly, pendant lights over sinks add visual interest while providing soft task lighting for evening cleanup.
Shera’s Personal Lighting Transformation
I installed under-cabinet LED strips first, mounting them 18-24 inches apart for consistent coverage. The difference felt immediate. No more squinting at recipe measurements or accidentally cutting too close to my fingers. I added pendants above my peninsula at exactly 30 inches from the counter surface, selecting transparent shades to avoid visual clutter. A dimmer switch lets me shift from bright meal prep mode to softer evening ambiance without delay.
Design Ideas for Small Kitchen Spaces
Small kitchen decorating ideas benefit enormously from proper lighting. Recessed downlights with wide beam spreads provide clean illumination without cluttering ceilings or interrupting sightlines. When evenly spaced and dimmable, they make tight spaces feel open and versatile. Additionally, toe-kick lighting creates the illusion of floating cabinets, opening rooms visually at night.
The most consistent mistake involves mixing color temperatures, creating visual dissonance that makes spaces feel smaller and jarring. Stick with either 2700K (warm) or 3000K (neutral-white) throughout your entire kitchen. Avoid over-saturating small spaces with tightly spaced or overly bright lights, which creates glare and reduces comfort. Aim for well-placed fixtures based on activity zones rather than symmetrical patterns.
Peninsula Layout Over Double Islands
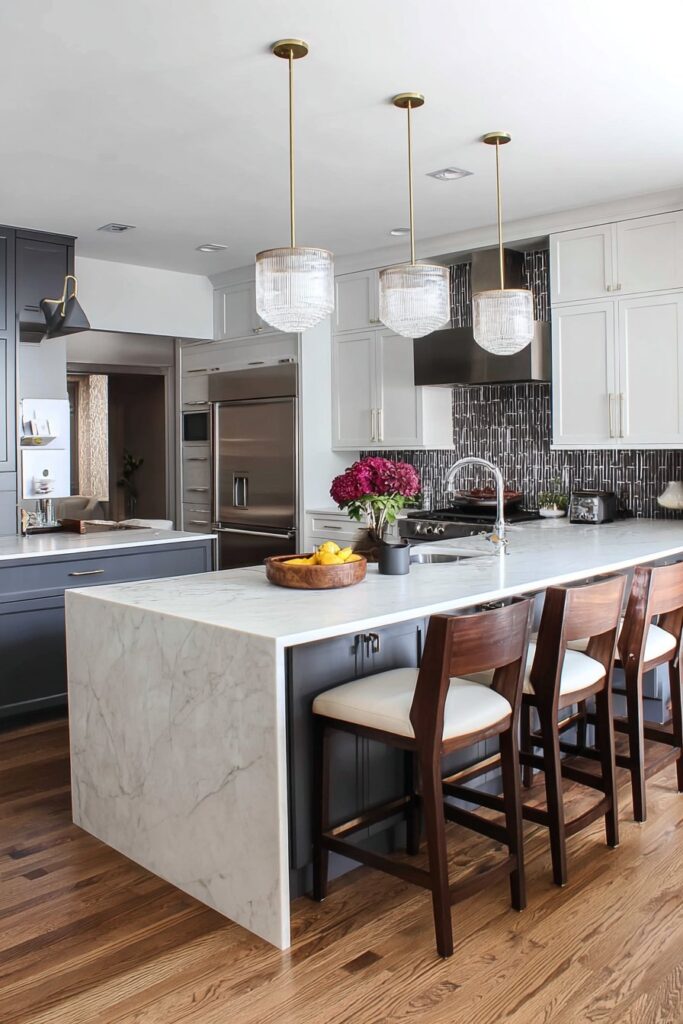
Considering double islands felt aspirational until I measured my actual kitchen space and realized I’d be squeezing through narrow gaps with grocery bags. That moment of honest assessment led me to explore peninsula designs, and I discovered an approach that delivers island functionality without sacrificing movement or creating bottlenecks in my cooking flow.
Why Peninsulas Improve Kitchen Flow
A peninsula connects to your existing cabinets or wall rather than standing alone, which fundamentally changes how space functions. What would become a narrow walkway around a freestanding island transforms into additional worktop area instead. This design maintains the work triangle more effectively than islands in many layouts. When an island would interrupt the straight line between your stove, sink, and refrigerator, a peninsula opens up the inner kitchen area while creating continuous workspace.
The peninsula naturally guides traffic flow around your work zone rather than through it. Guests and family members can reach the refrigerator or dining area without crossing your active cooking path. Besides offering workspace, the connected design provides stability without requiring extra reinforcement. I positioned mine to create a subtle barrier between my kitchen and living area, defining zones in my open floor plan without blocking sightlines or conversation.
Space-Saving Benefits for Small Kitchens
For kitchens measuring 10-13 feet wide, peninsulas provide island-like functionality without overwhelming the space. An island needs pathways on all sides, while a peninsula sits against a wall or cabinet run, immediately freeing up floor area. Even compared to islands, peninsulas offer more counter space specifically because that eliminated walkway becomes usable surface.
The National Kitchen and Bath Association recommends maintaining 42 inches of clearance between your peninsula edge and other counters or appliances. If multiple cooks regularly work in your kitchen, increase that measurement to 48 inches. These specifications ensure comfortable movement while maximizing available workspace. My 120-square-foot kitchen gained substantial prep area once I extended my L-shaped layout into a U-shape with a short peninsula.
How to Design a Functional Peninsula
Peninsulas scale to fit various kitchen sizes, transforming single-wall kitchens into L-shaped configurations or extending L-shaped layouts into U-shaped designs. Standard counter height sits at 36 inches, but raising one side to 42 inches creates a breakfast bar that hides kitchen mess from the dining side. This elevated section accommodates stools while maintaining the lower prep surface on the kitchen side.
I incorporated an overhang on my peninsula’s living room side, positioning three stools for casual meals and laptop work. The interior side houses storage with push-to-open cabinets. Utilities connect easily since one end abuts existing cabinetry, simplifying electrical, plumbing, and gas line placement. Standard peninsulas seat 2-3 people compared to islands that typically accommodate 3-4.
Simple Kitchen Designs for Small Kitchens
Peninsulas excel in compact galley kitchens by adding a dedicated dining spot that eliminates the need for separate tables. In my narrow space, I positioned a slim peninsula with butcher block countertop, adding pull-out drawers on the kitchen side for storage. The design creates small kitchen decorating ideas that balance function with visual appeal, maintaining open sightlines while defining separate zones for cooking and gathering.
Wall-Mounted Knife & Tool Storage
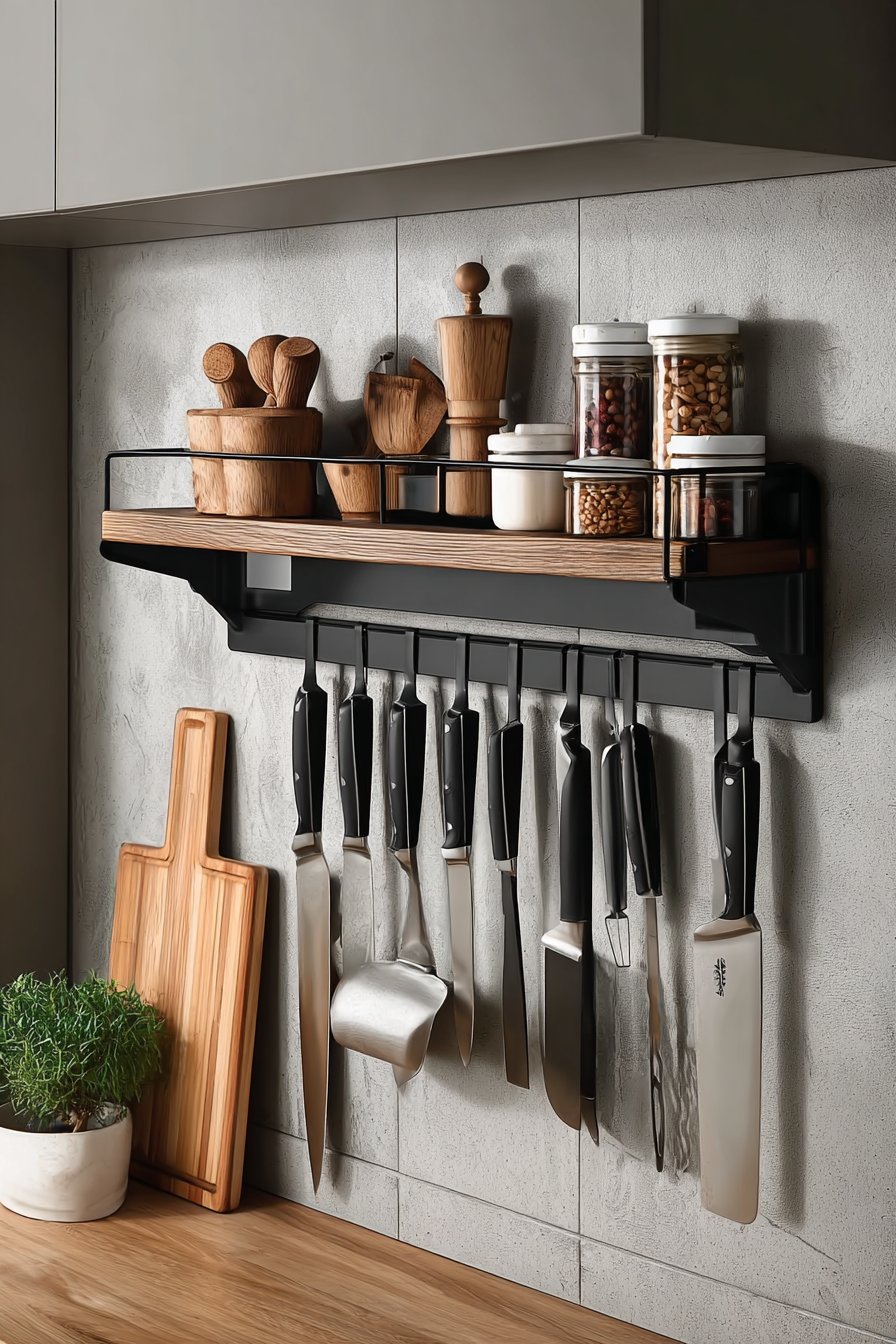
Digging through cluttered drawers while onions sizzled too long on the stove taught me that even organized kitchens fail when tools hide behind closed doors. I’d open three different drawers searching for my paring knife, losing precious seconds that turned perfectly sautéed vegetables into burnt frustration. Wall-mounted magnetic knife strips changed that completely, and they’ve become my solution for keeping essential kitchen decor designs both beautiful and genuinely functional.
Keeping Essential Tools Within Reach
Magnetic strips reclaim wall space while turning empty vertical areas into hardworking storage. Wall organizers transform those blank spots between cabinets into practical displays where every tool has its designated spot. Besides holding knives, these magnetic surfaces secure any steel utensil—spoons, ladles, whisks, and kitchen scissors all adhere firmly. This convenience means you grab what you need without interrupting your cooking rhythm.
The space-saving advantages matter especially for small kitchen decorating ideas. Magnetic holders eliminate countertop clutter and free drawer space for items that can’t hang. Specifically, they prevent knives from scratching against each other in drawers, keeping edges sharper longer. Available in lengths from 8 to 36 inches with custom sizing options, strips adapt to any available wall section. Wooden magnetic strips proved gentler on knife edges during testing, creating quieter placements and preventing blades from sliding around. Metal versions with textured surfaces also work well for those preferring low-maintenance options.
Installation and Placement Strategy
Most magnetic strips install via two methods. Screws provide the most secure attachment, requiring basic drilling into walls with included hardware. For tile backsplashes or surfaces where drilling isn’t possible, heavy-duty double-sided tape holds up to 20 kg per 10 cm after proper degreasing. The adhesive method lets you reposition strips by heating with a blow-dryer, though repeated moves reduce holding strength.
Placement location impacts both safety and workflow. Above the sink works perfectly for post-washing knife storage, keeping sharp tools away from children while staying accessible. Backsplash mounting near prep areas puts knives right where chopping happens. Accordingly, avoid positioning strips directly behind stoves where heat loosens adhesive and grease accumulates on blades. Mount strips with knives stored point-up so the bolster rests on the strip’s top edge, preventing accidental falls and protecting both blades and fingers.
Shera’s Favorite Organizational Tools
I installed an 18-inch wooden strip on my backsplash between the sink and prep zone. It holds my chef’s knife, paring knife, serrated bread knife, and kitchen shears where I reach for them constantly. Coupled with small S-hooks on the strip’s lower edge, I hang measuring spoons and my favorite wooden spatula. The transformation eliminated my drawer-diving habit completely, shaving minutes off every meal preparation.
Open Shelving with Storage Baskets
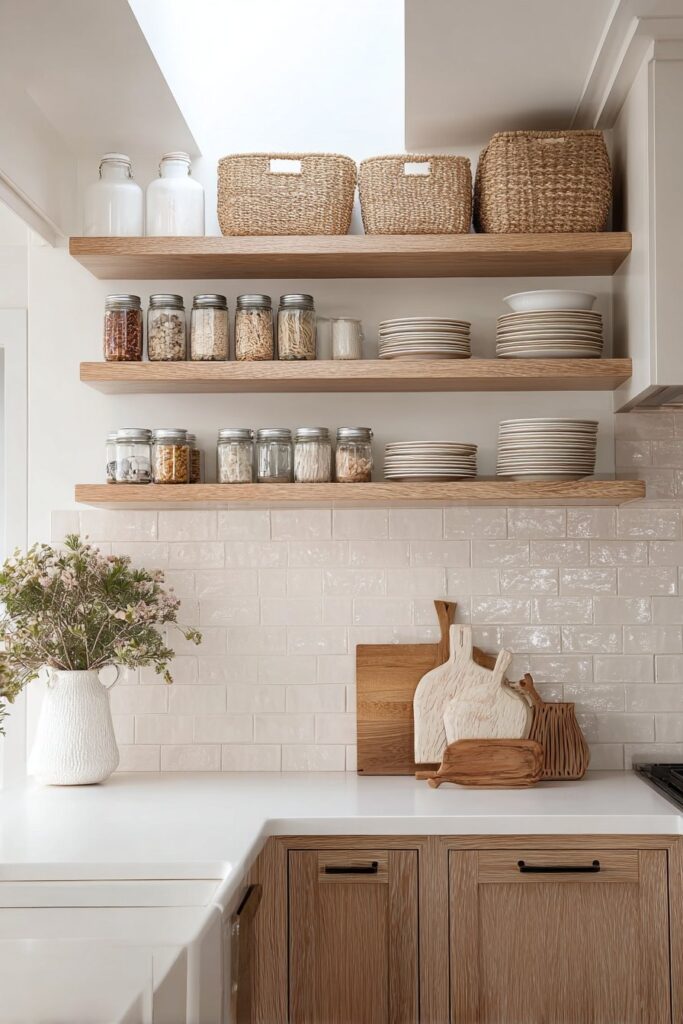
Cabinets with doors seemed like the obvious choice until I crouched down one too many times, pulled everything out to grab mixing bowls from the back, then restacked items I didn’t need. That ritual convinced me to try open lower shelving with baskets, and the shift transformed both my workflow and how my kitchen decor designs actually function for daily cooking.
Benefits Over Traditional Closed Cabinets
Open shelving creates an airy, open feel that makes kitchens brighter and more spacious. Compared to closed cabinets, everything sits within easy reach without opening doors, which eliminates steps when unloading the dishwasher. For instance, I positioned everyday plates and bowls on lower open shelves near my sink, cutting precious seconds from my cleanup routine.
The budget advantage matters too. Open shelving requires fewer materials than custom cabinets and costs less to install. In my case, I spent around $150 on a simple shelf unit with coordinating baskets, gaining functional storage without the expense of cabinet refacing. Besides saving money, open shelves let you showcase wall colors, exposed brick, or decorative backsplash tile that cabinets would hide.
Organizing System That Actually Works
Baskets became my solution for maintaining order while keeping items accessible. I use straight-sided baskets rather than angled ones because they fit better side by side and hold more. Two rectangle open-front baskets store fruit for my kids to grab easily, while larger bins contain onions, potatoes, and garlic.
Grouping items by task zones works brilliantly. Stack cake stands, pie dishes, and mixing bowls on shelves above where your mixer sits. Place everyday coffee mugs, plates, and basic glassware on lower shelves where you reach for them constantly. Accordingly, I keep baskets with dividers for seasoning packets and small items that would otherwise scatter.
Home Decor Ideas for Small Kitchen Styling
For simple kitchen designs small kitchens require, open shelving provides spaciousness that closed cabinets can’t match. Stick with two to four tiers maximum to avoid crowding. I created visual balance by matching similar items on a diagonal and using natural elements like wood and plants mixed with functional pieces.
Glass containers for flour, sugar, and pantry staples look attractive while keeping ingredients fresh. Equally important, limit materials to one or two types for a sleek appearance rather than mixing wood, ceramics, glass, and metal chaotically.
Maintaining Visual Appeal While Staying Functional
The key to preventing clutter involves editing ruthlessly. Don’t overstuff shelves or they’ll make your entire kitchen feel chaotic. Store frequently used items on open shelves since regular washing prevents dust buildup. Items you seldom use, like vases, can sit on higher shelves where occasional dust doesn’t matter.
I dust my shelves weekly, which takes minutes since I store mostly everyday dishes that cycle through the dishwasher regularly. Shelves near the stove require more frequent cleaning due to grease accumulation.
Functional Prep Zone Design
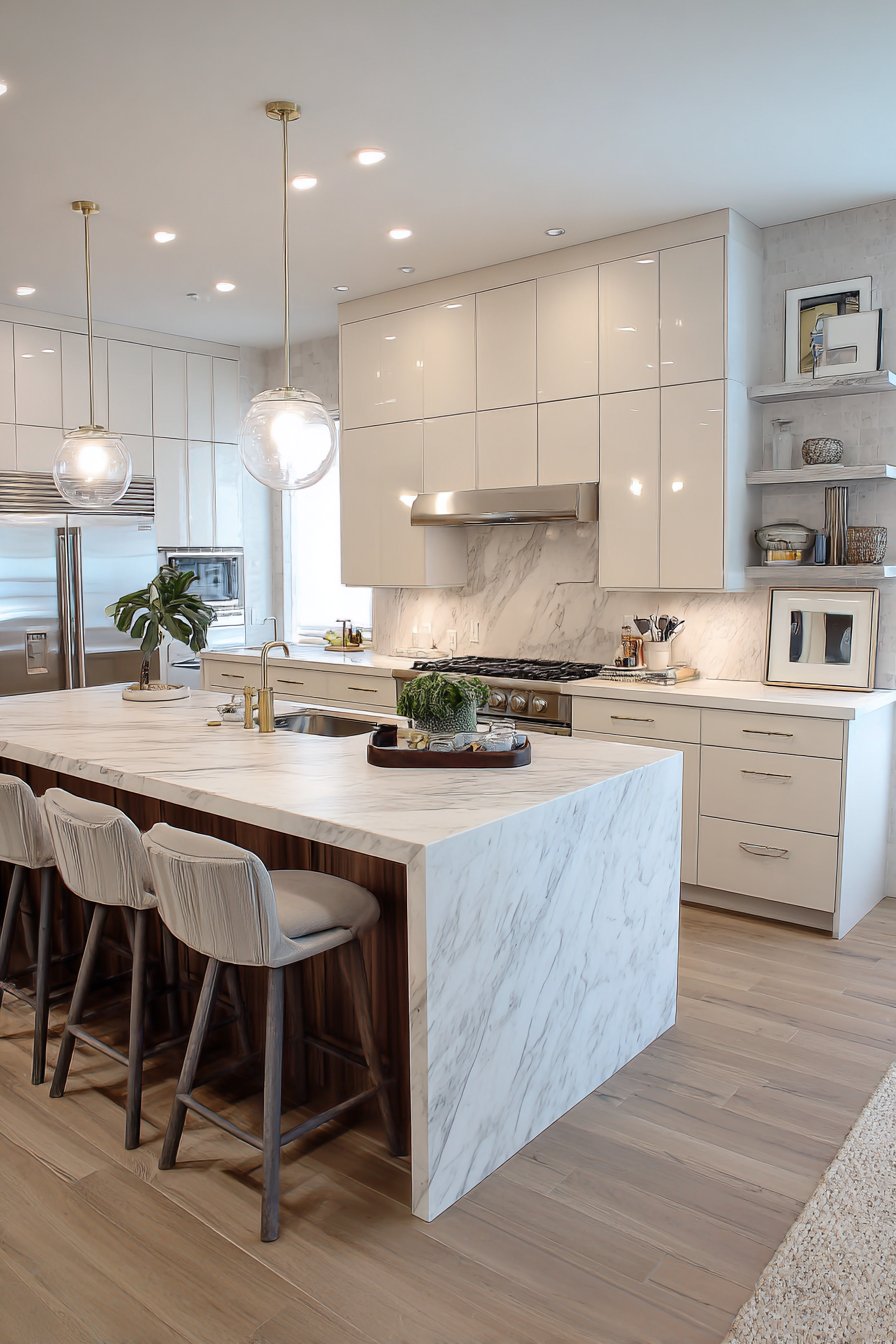
Spending an hour chopping vegetables shouldn’t leave my shoulders aching, but that’s exactly what happened until I understood that counter height directly impacts how my body moves through cooking tasks. Properly positioned prep zones transformed my kitchen decor designs from merely attractive to genuinely comfortable for extended meal preparation.
Why Counter Height Matters for Comfort
Counter height influences posture, reach, and how naturally you move through everyday tasks. When positioned well, it improves efficiency and reduces strain. A straightforward measurement method helped me find my ideal height: stand naturally with arms bent at a ninety-degree angle, then subtract two to four inches from that elbow measurement. This positioning allows hands to move efficiently without strain.
Standard countertop height sits at 36 inches, combining 34.5-inch base cabinets with 1.5-inch countertops. For instance, taller individuals often prefer raising heights to 37 or 39 inches, while shorter people find 32 inches more comfortable. If the surface sits too tall, shoulders lift and create tension, while too-low heights cause backs to round.
Creating Multiple Work Stations
The prep zone functions best when positioned between the refrigerator and cooktop, close to the sink for efficient cleanup. I prefer workstation sinks approximately 36 inches wide with three feet of counter space on one side for food preparation and a minimum of 18 inches on the other. Workstation spacing between kitchen areas should measure 41 to 47 inches, allowing freedom of movement without feeling cramped. Each cook requires a minimum of 36 inches of dedicated counter space.
Design Considerations for Different Users
Different tasks demand varying heights. During chopping and detailed prep work, slightly lower surfaces between 33 and 35 inches feel more natural. Baking tasks work easier at reduced heights around 33 inches, especially for rolling dough. Kitchens designed for wheelchair access typically feature countertop heights at 32 or 34 inches.
Small Kitchen Decorating Ideas for Prep Areas
For simple kitchen designs small kitchens require, slim rolling kitchen carts provide extra counter space. Even narrow consoles work as spots to set tools and ingredients while cooking. Small butcher-block islands with trash cabinets can double workspace and roll away when not needed.
Vertical Kitchen Storage Solutions
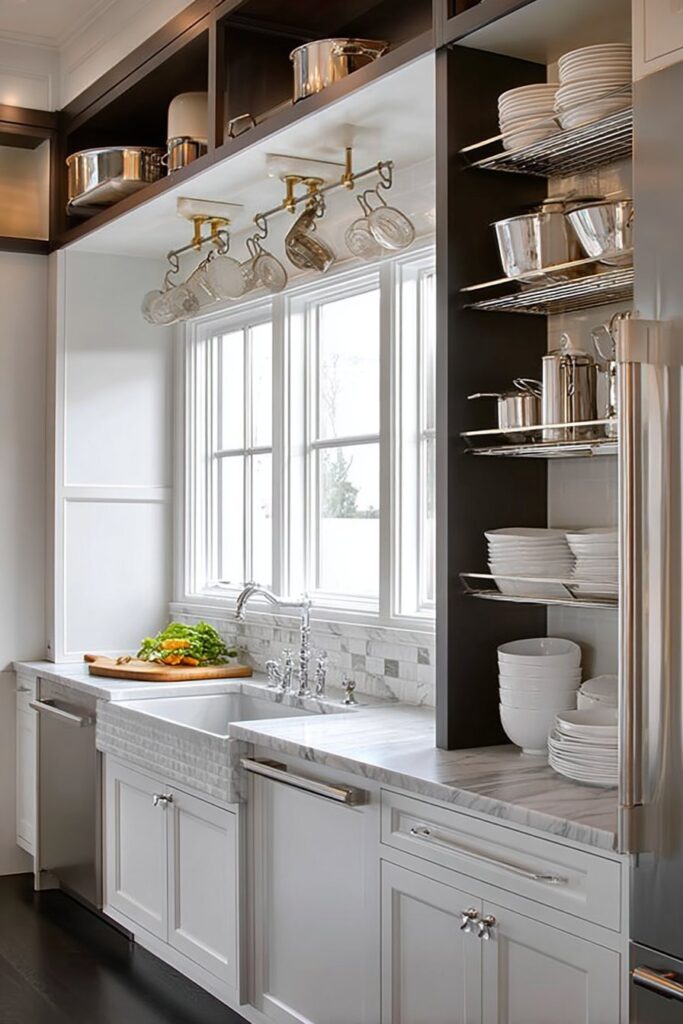
Running out of cabinet space felt inevitable until I realized I’d been ignoring the most obvious solution hovering right above my head. Empty wall space stretched from my countertops nearly to the ceiling, completely unused while I crammed items into overflowing lower cabinets.
Maximizing Vertical Space Efficiently
When square footage is limited, building upward changes everything. In fact, 72% of kitchen designers now specify cabinets extending to 9-foot ceilings or higher, and 64% of homeowners remodeling small kitchens prioritize vertical storage over expanding square footage. Extending cabinetry closer to the ceiling eliminates wasted space and creates continuous storage from countertop upward. Stacked upper cabinets add a second row above primary cabinets, separating storage by function with everyday items at mid-level and specialty cookware in upper tiers.
Types of Wall Storage That Work Best
Pegboards transformed my backsplash area into functional display space where I hang utensils, dish towels, and small tools. Pot racks mounted above my stove keep cast-iron skillets and frequently used pans accessible while freeing lower cabinets for other essentials. Rails installed on backsplashes hold kitchen tools, mugs, and seasonings within arm’s reach. Floating shelves work beautifully for spices and cups under existing cabinets. For instance, narrow pullout cabinets just inches wide store oils and herbs directly next to my cooktop.
How Shera Uses Vertical Space in Her Kitchen
I installed ceiling-height cabinets for seasonal serving platters and specialty appliances I use occasionally. Lower shelves hold everyday dishes, while upper tiers store holiday cookware. Additionally, I mounted hooks on an empty wall section for hanging produce baskets, keeping counters clear.
Kitchen Designs for Small Kitchens
Vertical solutions prove ideal for simple kitchen designs small kitchens require. Wall-mounted racks maximize storage without consuming floor space, maintaining open pathways while dramatically increasing capacity.
Cohesive Colors for a Clean Look
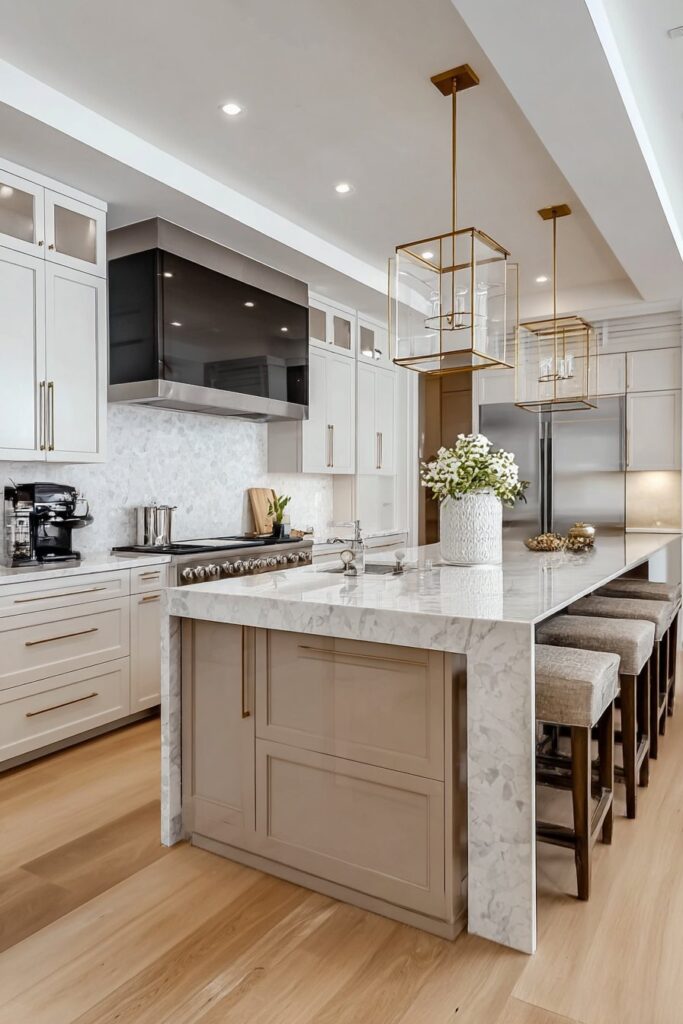
Color combinations changed everything about how my kitchen functions, though I didn’t expect esthetics to impact efficiency so dramatically. When I finally coordinated my palette properly, visual chaos disappeared and cooking became less stressful.
How Color Affects Kitchen Functionality
Color triggers both conscious and subconscious responses that affect emotional state and perception of space. The most psychologically beneficial kitchens follow the 60-30-10 rule: 60% dominant color for cabinets, 30% secondary color for walls or countertops, and 10% accent color. This balance creates visual harmony that reduces stress and promotes positive behaviors. Monochromatic schemes help reduce visual clutter in small spaces, while light colors make compact kitchens feel more open. Dark colors like navy blue or dark green give elegant, cozy expressions in larger kitchens.
Choosing Colors That Energize Your Cooking Space
Analogous colors—those next to each other on the color wheel—create cohesive palettes. Warm oranges and reds feel exciting and energetic, perfect for entertaining. Cool blues and greens provide sophisticated, serene atmospheres. Red stimulates appetite, which explains why fine dining establishments favor red tones. Neutral shades like white, gray, and beige remain most popular while reflecting maximum light.
Shera’s Approach to Kitchen Color Coordination
I coordinated my wall color with my backsplash first since it calls the biggest shots. My cabinets came next, then countertops. Maintaining the same color theme as nearby rooms creates cohesion in open floor plans.
Conclusion
Given these points, implementing all nine design strategies at once might feel overwhelming. Start with what frustrates you most about your current kitchen. For me, it was the constant back-and-forth movement that turned cooking into a workout. I tackled the work triangle first, then gradually added pull-out organizers and better lighting. Your kitchen should work as hard as you do, supporting your daily routine instead of fighting against it. Pick one change, test how it transforms your cooking flow, then build from there. Beautiful kitchen decor designs mean nothing if they don’t make your life genuinely easier.